FastDFS是一个开源的高性能分布式文件系统(Distributed File System)。它解决了大数据量存储和负载均衡等问题。能够满足照片、视频分享等类型网站的需求。
FastDFS有三个角色:tracker、storage和client。
- tracker:主要做调度工作,起负载均衡的作用。在内存中记录集群中所有存储组和存储服务器的状态信息,是客户端和数据服务器交互的中枢。
- storage:存储文件和文件属性(meta data)。Storage直接利用OS的文件系统调用、管理文件。
- client:客户端,通过专有接口,使用TCP/IP协议与tracker或storage进行数据交互(上传、下载等等)。
下面是CentOS 6.6下搭建FastDFS的方法:
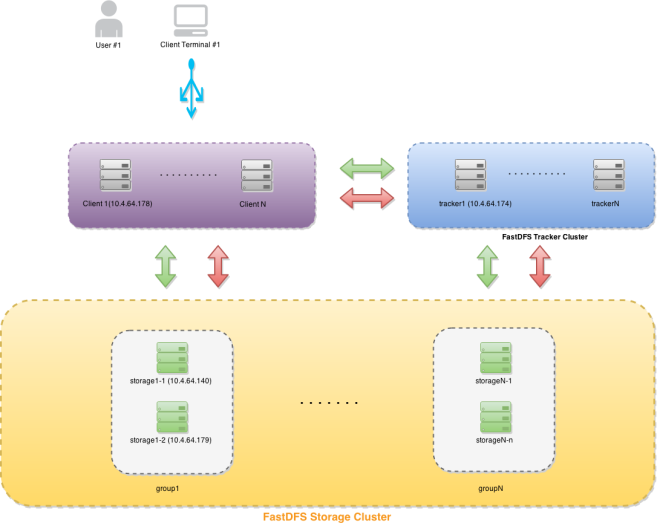
基本架构图
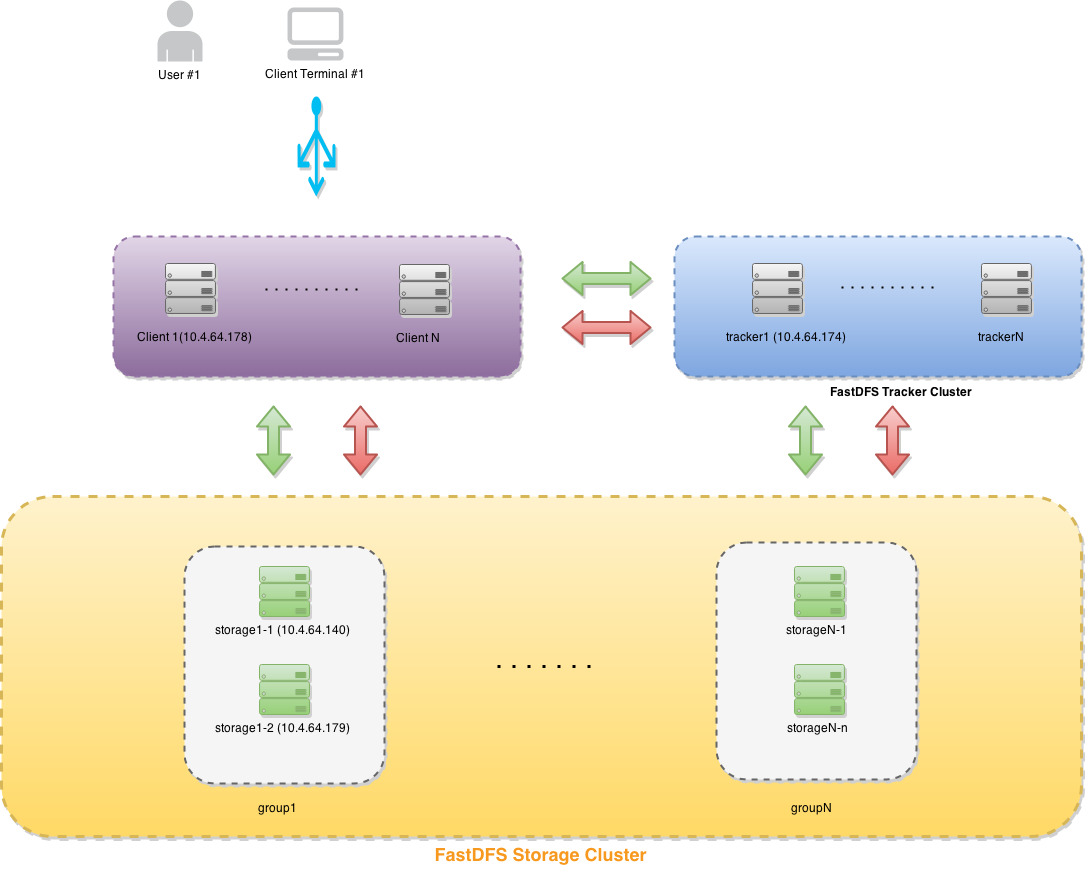
说明:
tracker1: ip 10.4.64.174
storage1: ip 10.4.64.140
storage2: ip 10.4.64.179
client: ip 10.4.64.178
Tracker的安装及配置
1.安装编译器
yum install -y gcc gcc-c++
2.下载安装libevent
wget https://sourceforge.net/projects/levent/files/libevent/libevent-2.0/libevent-2.0.22-stable.tar.gz
tar xvzf libevent-2.0.22-stable.tar.gz
cd libevent-2.0.22-stable
./configure
make && make install
3.下载安装fastDFS
wget http://code.google.com/p/fastdfs/downloads/detail?name=FastDFS_v4.06.tar.gz
tar -xvzf FastDFS_v4.06.tar.gz
cd FastDFS
./make.sh
./make.sh install
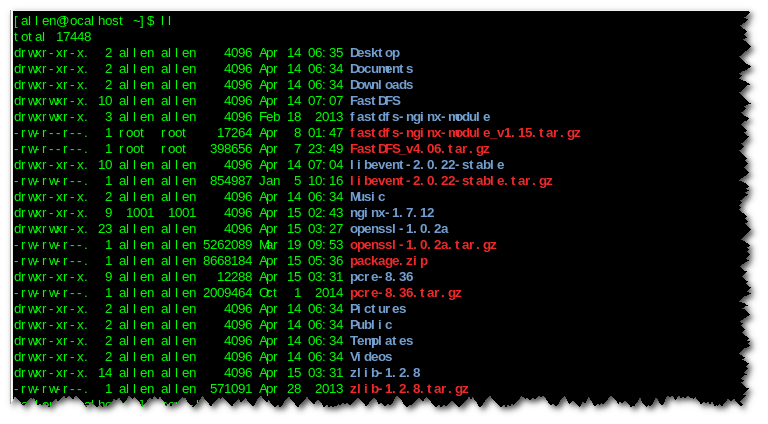
安装成功后/usr/local/bin下会出现一系列fastDFS命令,如下图

4.配置tracker
vim /etc/fdfs/tracker.conf
修改base_path以存储tracker信息(这里不做修改,使用默认路径/home/yuqing/fastdfs,需要先行创建目录)
5.启动tracker
/usr/local/bin/fdfs_trackerd /etc/fdfs/tracker.conf
Storage1配置
1~3:参考Tracker安装步骤
4.配置storage
vim /etc/fdfs/storage.conf
修改tracker_server=10.4.64.174:22122
修改base_path以存储storage信息(这里不做修改,使用默认路径/home/yuqing/fastdfs,需要先行创建目录)
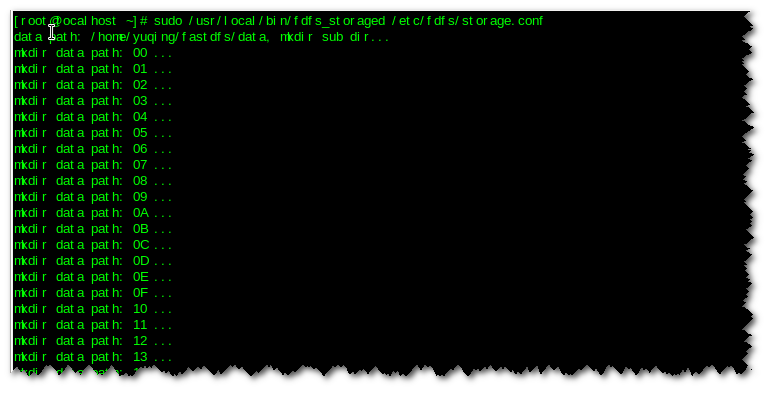
5.启动storage
/usr/local/bin/fdfs_storaged /etc/fdfs/storage.conf
启动过程中,fastDFS会在base_path下的data目录中创建一系列文件夹,以存储数据
6.安装nginx及fastdfs-nginx-module
由于fastDFS自带的http服务性能欠佳,需要安装nginx及fastdfs-nginx-module(或者 apache 及fastdfs-apache-moduel)来处理文件请求
安装依赖包
yum install -y pcre-devel libmxl2-devel libxslt-devel gd-devel
yum install -y perl-devel perl-ExtUtils-Embed
yum install -y GeoIP GeoIP-devel
下载zlib,prce,openssl,nginx,fastdfs-nginx-module进行联合编译
wget http://zlib.net/zlib-1.2.8.tar.gz
wget http://sourceforge.net/projects/pcre/files/pcre/8.36/pcre-8.36.tar.gz/download
wget https://www.openssl.org/source/openssl-1.0.2a.tar.gz
wget http://nginx.org/download/nginx-1.7.12.tar.gz
wget http://code.google.com/p/fastdfs/downloads/detail?name=fastdfs-nginx-module_v1.15.tar.gz
cd nginx-1.7.12
./configure --user=nginx --group=nginx --prefix=/usr/share/nginx --sbin-path=/usr/sbin/nginx --conf-path=/etc/nginx/nginx.conf --error-log-path=/var/log/nginx/error.log --http-log-path=/var/log/nginx/access.log --http-client-body-temp-path=/var/lib/nginx/tmp/client_body --http-proxy-temp-path=/var/lib/nginx/tmp/proxy --http-fastcgi-temp-path=/var/lib/nginx/tmp/fastcgi --http-uwsgi-temp-path=/var/lib/nginx/tmp/uwsgi --http-scgi-temp-path=/var/lib/nginx/tmp/scgi --pid-path=/var/run/nginx.pid --lock-path=/var/lock/subsys/nginx --with-http_ssl_module --with-http_realip_module --with-http_addition_module --with-http_xslt_module --with-http_image_filter_module --with-http_geoip_module --with-http_sub_module --with-http_dav_module --with-http_flv_module --with-http_gzip_static_module --with-http_random_index_module --with-http_secure_link_module --with-http_degradation_module --with-http_stub_status_module --with-http_perl_module --with-mail --with-mail_ssl_module --with-pcre=/home/allen/pcre-8.36 --with-zlib=/home/allen/zlib-1.2.8 --with-openssl=/home/allen/openssl-1.0.2a --with-ipv6 --add-module=/home/allen/fastdfs-nginx-module/src
make
make install
7.配置nginx
cp /home/allen/fastdfs-nginx-module/src/mod_fastdfs.conf /etc/fdfs/
vim /etc/fdfs/mod_fastdfs.conf
修改
tracker_server=10.4.64.164:22122
url_have_group_name = true
vim /etc/nginx/nginx.conf
location /group1/M00 {
    root /home/yuqing/fastdfs/data;
    add_header fsserver "storage1";
    ngx_fastdfs_module;
}
添加nginx用户
groupadd www
useradd nginx -G www
8.启动nginx
/usr/sbin/nginx -c /etc/nginx/nginx.conf
Storage2配置
参照storage1配置
Client配置
1~3:参照tracker配置
4.配置client
vim /etc/fdfs/client.conf
修改tracker_server=10.4.64.174:22122
上传一个文件测试
/usr/local/bin/fdfs_upload_file /etc/fdfs/client.conf ~/Downloads/Wikipedia-Logo.png
得到文件名
group1/M00/00/00/CgRAjFUvcqGAUxb0AACOtw532Ec266.png
组名/虚拟磁盘名/一级目录/二级目录/文件名
5.安装php,php-devel,php-fpm
yum install -y php php-devel php-fpm
6.编译安装php_fastdfs模块
cd FastDFS/php_client
phpize
./configure
make
make install
7.配置php_fastdfs模块
cp FastDFS/php_client/fastdfs_client.ini /etc/php5/conf.d
8.安装配置nginx
yum install -y nginx
修改/etc/nginx/nginx.conf,添加以下内容,负载fastDFS文件请求
http
upstream fs{
    server 10.4.64.179:80;
    server 10.4.64.140:80;
}
server
location /group1/M00 {
    proxy_pass http://fs;
}
location ~ \.php$ {
    root           /var/www/html;
    fastcgi_pass   127.0.0.1:9000;
    fastcgi_index  index.php;
    fastcgi_param  SCRIPT_FILENAME  $document_root$fastcgi_script_name;
    include        fastcgi_params;
}
9.启动php-fpm和nginx
/usr/sbin/php-fpm
/usr/sbin/nginx -c /etc/nginx/nginx.conf
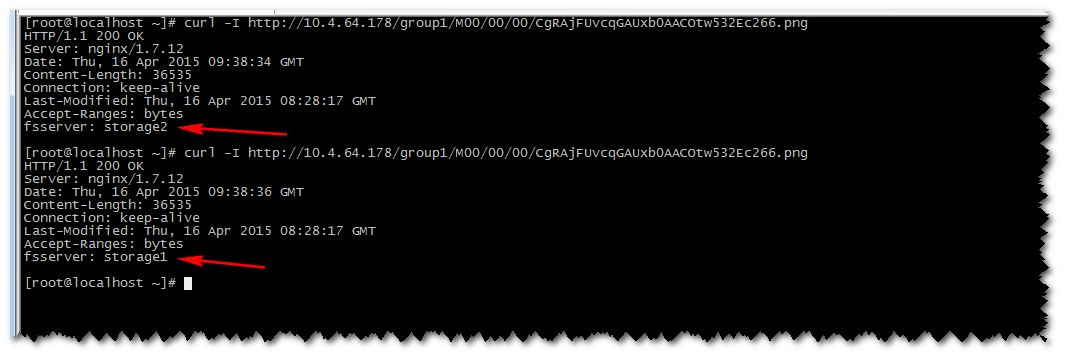
10.测试
两次访问之前上传的图片,来自不同的storage